
Unlocking the Night Sky: Your Essential Guide to Choosing the Perfect Equatorial Mount | Best Rates | Buying Guide | Detailed Tips | Maintenance | FAQ |
Unlocking the Night Sky: Your Essential Guide to Choosing the Perfect Equatorial Mount
Have
you ever stood looking up at the stars, telescope in hand, and been frustrated
with fuzzy photos of the Moon or unsteady views of Saturn? You're not alone. A
lot of amateur astronomers are stymied by this problem. The key to going beyond
fuzzy frustration to jaw-dropping clarity isn't always a more powerful
telescope—it's what the telescope is mounted on.
That
key is the equatorial mount.
Think
of it like the foundation of your whole astrophotography system. Wobbly
foundation = wobbly results. It's a rigid, accurate foundation that lets you
follow galaxies a million light-years away with pin-point accuracy.
This is your handbook. We will define what an equatorial mount is, why serious astronomy requires it, and walk you through step by step just what to do when buying one. Let's build your astrophotography aspirations on a rock-solid foundation.
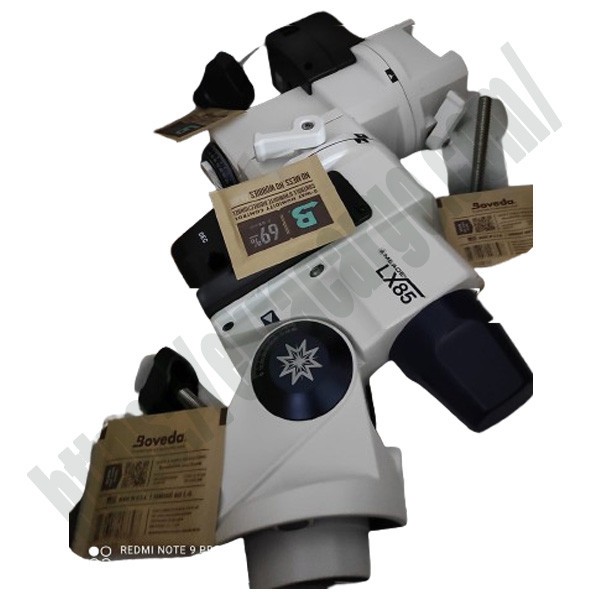
Explore Our Telescope LX85 at Ekra Cargo
What
is an Equatorial Mount and Why Do You Need One?
A
true equatorial mount is a tripod head with a special design that can turn
around a single axis parallel to the Earth's rotation axis.
The
Simple Analogy: Imagine the Earth rotating around on its axis. Now imagine a
mount that can rotate in the reverse direction at the same speed. That is
basically what an equatorial mount is all about. By mimicking the rotation of
the Earth, it will maintain celestial objects right in the center of your
telescope eyepiece or camera detector.
This
is significant for two reasons that count:
Easy
tracking: With an alt-azimuth (up-down, left-right) mount, you have to keep pushing
your telescope to track a planet or star. An equatorial mount, properly
aligned, will do it for you with a simple motor drive. You can track for hours
without having to adjust.
The
Key to Long-Exposure Astrophotography: This is the biggest reason. To capture
faint nebulae and galaxies, you need exposure times between 30 seconds and a
few minutes. Any movement spoils the image. Smooth, precise tracking by an
equatorial mount is the only way of getting those clear, detailed pictures of
deep-space objects.
Equatorial
Mount vs. Alt-Azimuth Mount: What's the Difference?
It's
the most common question for newbies. Here's the lowdown:
Feature
Equatorial Mount (EQ) Alt-Azimuth Mount (Alt-Az)
Movement
One axis (Polar Axis) parallel to Earth's pole. Two axes: Altitude (up/down)
and Azimuth (left/right).
Tracking
Automatically tracks the arc of stars with one motor. Requires computerized
correction on two axes (more complex).
Best
For Long-exposure astrophotography, fine visual observing. Visual observing,
planetary photography, daytime terrestrial observing.
Learning
Curve Moderate to High (have to learn polar alignment). Low (very intuitive,
point-and-shoot).
Field
Rotation Taken out of astrophotography. Occurs, causing star trailing with long
exposures.
The
Verdict: If at any time your wish is to capture something besides the Moon and
planets, an equatorial mount is not an option—it's a requirement.
Important
Features to Seek Out Before You Buy
Equatorial
mount parameters can be deceptive. Look for these important features:
1.
Payload Capacity
This
is the maximum weight the mount will hold while still tracking accurately. This
is the most important single spec.
Rule
of Thumb: The total weight of equipment (telescope, camera, guidescope,
accessories) should not be more than 60-70% of the mount's weight capacity.
Anything more will lead to poor performance and vibrations. A struggling mount
will never provide good images.
2.
GOTO vs. Manual
Manual
Mounts: You search for objects by hand moving the telescope with setting
circles or star-hopping. Good for learning the sky but not good for faint
objects.
GOTO
Mounts: These computerized mounts contain thousands of objects in a database.
You align the mount, select a target on the hand controller, and the mount
slews automatically to it. A time-saver supreme and good for both beginners and
veterans.
3.
Tracking Accuracy: Periodic Error
All
of the gear mounts exhibit some unsmoothness or wobble of their worm gears,
called Periodic Error (PE). More costly mounts experience very little PE. Less
expensive mounts can use a facility called PEC (Periodic Error Correction),
wherein the mount "learns" and corrects for its own flaw.
4.
Portability
Are
you observing from your own backyard or hiking to a dark-sky site? Weight and
mount time come into play. Heavier, more substantial mounts are heavier to lug
around but provide more stability.

Best
Equatorial Mount Options
Following
is a list of some of the best and most well-liked mounts out there, which suit
a range of budgets and levels of experience.
For
the Beginner: Sky-Watcher EQM-35 Pro
Pros:
Excellent first GOTO mount with good 20lb payload. Excellent for smaller
refractors and DSLR lenses. Fairly light and portable. Excellent introduction
to serious astrophotography.
Cons:
Payload restricts telescope size. May require a bit more messing around (e.g.,
belt mod) to achieve best long-term performance.
Best
For: Beginner who needs an out-of-the-box GOTO system to image galaxies and
nebulae using a small telescope.
For
the Intermediate Enthusiast: Our Ekra Cargo LX85 Mount
(This
is where you would normally introduce your product)
Pros:
Our EQ-500 Mount is designed for the serious amateur hobbyist and delivers the
perfect balance between performance and value. With its 30lb payload capacity,
it will mount mid-size refractors and imaging setups firmly. Fitted with
ultra-smooth belt-driven motors and advanced GOTO technology, it provides
incredible tracking accuracy right out of the box. Its intuitive hand
controller and smartphone connectivity make alignment and navigation easy.
Pros:
Heavier than early models, so not as well placed for frequent long-distance
travel. Requires a sturdy tripod to work best (separately or in a package).
Best
For: Serious astrophotographers who have outgrown their initial mount and
require a strong, accurate workhorse to make amazing deep-sky photos without
spending too much. Buy the EQ-500 Bundle Deals Here! (Internal Link to your
product page)
For
the Advanced Imager: Sky-Watcher HEQ5 Pro
Pros:
Uncontested "workhorse" of the mid-range astrophotography community.
Extremely reliable, heavy capacity (30lbs), and well-tested tracking precision.
Huge community support for troubleshooting and upgrading.
Cons:
More costly. Slightly heavier than entry-level models.
Best
For: Anyone serious about astrophotography as a long-term, serious hobby. This
is a mount you won't outgrow.
For
the Professional: Celestron CGX-L
Pros:
Tremendous payload capacity (75lbs) for large telescopes. Excellent build
quality and precision for the most serious imagers.
Cons:
Very expensive, very heavy, and requires a lot of setup time.
Best
For: Observatory or serious imagers with large, heavy telescopes.
The
Astrophotographer's Buying Guide: Matching a Mount to Your Objective
Ask
yourself these questions before clicking "buy":
What
is my primary objective?
Casual
Visual Observing: Any manual equatorial mount or even a decent alt-az mount
will do.
Planetary
Imaging: A GOTO equatorial mount is strongly recommended to hold the planet
centered in front of a high-frame-rate camera.
Deep-Space
Astrophotography: A heavy-duty GOTO equatorial mount is required. Payload
capacity and tracking accuracy are more important than anything else.
What
is my total equipment weight?
Weight
your telescope, camera, guide scope, and accessories. Then choose a mount with
at least 1.5 times the combined weight in its payload capacity. That way, it
will be stable and work well.
What
is my budget?
Don't
forget to budget for the entire system. A great mount is worthless on a
low-quality tripod. Consider packages with a tripod or power supply included.
Getting
Started: Your First Night with an Equatorial Mount
Most
difficult for novices is Polar Alignment—aligning the mount's axis with the
Earth's rotational axis.
Setup:
Place your mount on a level surface. Approximate the polar axis (the one with
the latitude scale) towards Polaris, the North Star.
Polar
Scope: Most mounts will have a polar scope on them—a small telescope inside the
polar axis. Use it to position Polaris directly in the reticle. Modern mounts
will typically include software (like SharpCap or N.I.N.A.) that will guide you
through precise alignment with your camera.
Star
Alignment: You'll then perform a 2- or 3-star alignment for GOTO mounts. The
mount slews to bright stars, and you align them in the eyepiece to establish
its model of the sky.
Don't worry if it takes a few attempts! Polar alignment is an art that improves with practice.

Check the Telescope LX85 at Ekra Cargo
Conclusion:
Your Gateway to the Cosmos Awaits
The
one investment you will ever make that is truly best on your path to
astrophotography is in the good equatorial mount. It is the workhorse that does
its thing silently while you get to bask in the magic of capturing the
universe.
There
are only so many great options out there, but the catch is to select a mount
that grows with you—one that gives you the precision you expect without excess
sophistication.
For
you, then, the seeker of that ultimate blend of performance, reliability, and
value, our [Your Brand Name] EQ-500 Mount is the cornerstone of your future
astrophotography rig. It's the durable foundation your dark-sky adventures
deserve.
Ready
to take it to the next level? Visit the technical specs and customer reviews of
the EQ-500 on our product page, and feel free to contact our team of astronomy
enthusiasts with any questions!

Ekracargo.com - Your trusted partner in industrial efficiency, providing a wide range of premium quality spare parts at competitive prices.
Contact Info
- Address: House 54 | Road 14 | Sector 14 | Uttara | Dhaka 1230 | Bangladesh
- Phone: Contact: +8801634736139 (WhatsApp) ,+8801789394669 (WhatsApp)
- Email: info@ekracargo.com
